Tuesday, April 23, 2013

Inner Beam fabric layup

Most of the boat building fabric layups are straightforward and do not appear to pose a real challenge at this point. However, when it comes to the beams the story is a bit different! Get these wrong and you'll be in a world of hurt... up to and including death! There are numerous warnings in the instructions to get this part exactly right or end up looking like the skull and crossbones pictures shown.

The manual itself dedicates a large section to beam building and I have reviewed it numerous times. As you might imagine, the instructions show this perfect layup flowing smoothly over all the parts and I just sit here trying to figure out exactly how that fabric will conform to all those angles while avoiding excessive pleats, folds and fiber distortion - especially over the Beam Recess Mold and towards the innermost section.

So, I started playing around with some paper models to get some plan worked out. Several ideas came to mind but eventually I came up with the following:


This turned out to be nice and neat, but I had some doubts about the side panels that would be required. Actually, those panels wouldn't even be a problem if I could just lay in a "cap" piece to capture the entire beam mold,, but this part is height critical so you can't just put a bunch of overlaps there.

I sent it over to Ian for review and approval but it was ultimately rejected due to the butt joins required on those side panels... so this idea goes straight into the trash and back to the drawing board I go!

The next pattern will be a two-piece assembly, one over the Beam mold and then tied into the rest of the fabric with 100mm staggered lap joins.

More on that later.

On another note, Endurance emailed me today to let me know the Epoxy will be shipped out today. So I might be able to do my first test infusion over the weekend!?


Monday, April 15, 2013

Inner Beam Mock-Up


Busy weekend, but I did manage to pick up a few things in town and do a bit more work on the inner beam model.

As per the instructions, I put some packing tape onto the Beam Recess mold to prevent the Epoxy from sticking - but after doing so, I can see how this will likely cause some vacuum integrity problems. For the "real" molds, I will go with paint/wax or PVA as a release agent instead of packing tape.

The Upper Folding recess mold is just a scrap piece of 2x8 lumber cut to fit. It is not to scale, but will serve the purposes of this experiment. I did put four coats of epoxy on it to prevent wood moisture, sap & etc from going through my vacuum pump later on.

Beam Recess mold in place
UFS mockup in place


First layer of standard home insulation


One of my biggest concerns is seeing how the fabric will actually lay into the cavity without all the creases and folds. At this point, I just don't see how this will be possible without several cuts and pleats which I'm trying to avoid if possible. To that end, I will try installing three layers of 12oz instead of two layers of 18oz. since it is quite a bit more pliable.

I will try my best, but I really don't want to fool myself into thinking this part will come out exactly as I'd like it to. For now I am leaving the flanges well over-sized.

No bagging materials have been received from Air-Tech yet. I'll call them later today to see if there is some shipment information or status available. I did order a gallon kit of Epoxy. That should be here later this week. It's really thin, I plan to paint on a thin coat on the outside of the foam to help seal it up.

**************
Update: AirTech samples are scheduled to arrive this Friday

Saturday, April 6, 2013

Inner Beam Mock-up

I now have several yards of various fabrics to test with, but I still don't have any of the other materials required for Resin Infusion or Vacuum bagging. Unfortunately, I'm not ready to begin purchasing large rolls of films that may end up sitting around for a year or more just so I can do a few tests... So, last week I started looking around for some Resin Infusion Starter Kits.

Most of the kits I found included items such as Vacuum Chambers, gloves, vacuum lines, fiberglass materials and other things I just didn't need.

They also cost $500-$1200!

AirTech has one of the nicer sites out there with a LOT of different materials listed, so I sent an email to them explaining what I needed and inquired about purchasing small amounts for testing. They called me back early the next day and asked what samples I was interested in and then told me the items would be shipped the next business day!

I was floored - how cool is that!

So now I'll have most of the materials in hand to do a few tests while continuing to pay off some bills, take care of things around the house, purchase tools and prepare for the actual build.

As for Resin Infusion, I've been following the bulletin boards, reading up on anything I can get my hands on and watching YouTube videos over the last three years to learn as much as I could.

I do have a few test cases prepared. There is a requirement to have a certain thickness of solid glass in the beams but I do know that a full vacuum will compress the fibers, so I will do a straight strip with some stair-stepping from one to eight or ten layers and then check the final part thicknesses to determine how many layers will be needed. It will also give me some insight to how the resin flow reacts to multiple layers. I'll also split that test into zones for flow control familiarization. I'll also do a small double-sided panel infusion to see how that goes since that is the method I want to use for the bulkhead construction.

When the build starts for real, I'll be starting with some bulkheads before moving on to the beams. With that in mind, I decided it would be a good idea to build a mock-up of the inner portion of a beam assembly for some hands-on practice.
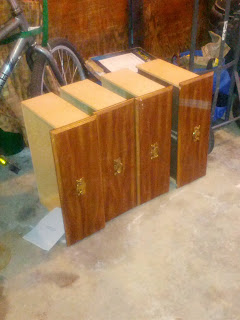
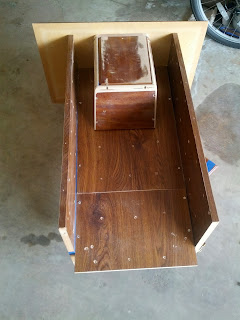
On my way to drop my daughter off at work, I found a TV stand and some dresser drawers someone put out to the road for trash pickup. I threw them in the back of the car and went home to take them apart to create a model. The inner section of the beam mold is very "busy" as there are many layers of glass reinforcements going in along with angle transitions and then some Carbon Uni thrown in to make it fun.

I'm curious if it might be possible to infuse the entire assembly in one shot? But I do believe that's a lot to ask from someone who's never actually DONE an infusion yet.

So anyway, here are some pictures of the model being built:


I'll finish the Beam Mold next weekend and pick up some blue foam panels from Lowe's to use as some test pieces. The blue foam panels are for home insulation purposes and will not be the same quality as closed cell Divinycell foam. As a result, they may not be vacuum tight - so I might have to end up putting a thin coat of epoxy to seal the foam surface. I'll try pulling a vacuum on a solid piece of foam before going that route.

As for Epoxy, I plan on contacting Endurance Technologies next week to see if I can get a gallon or so sent out.