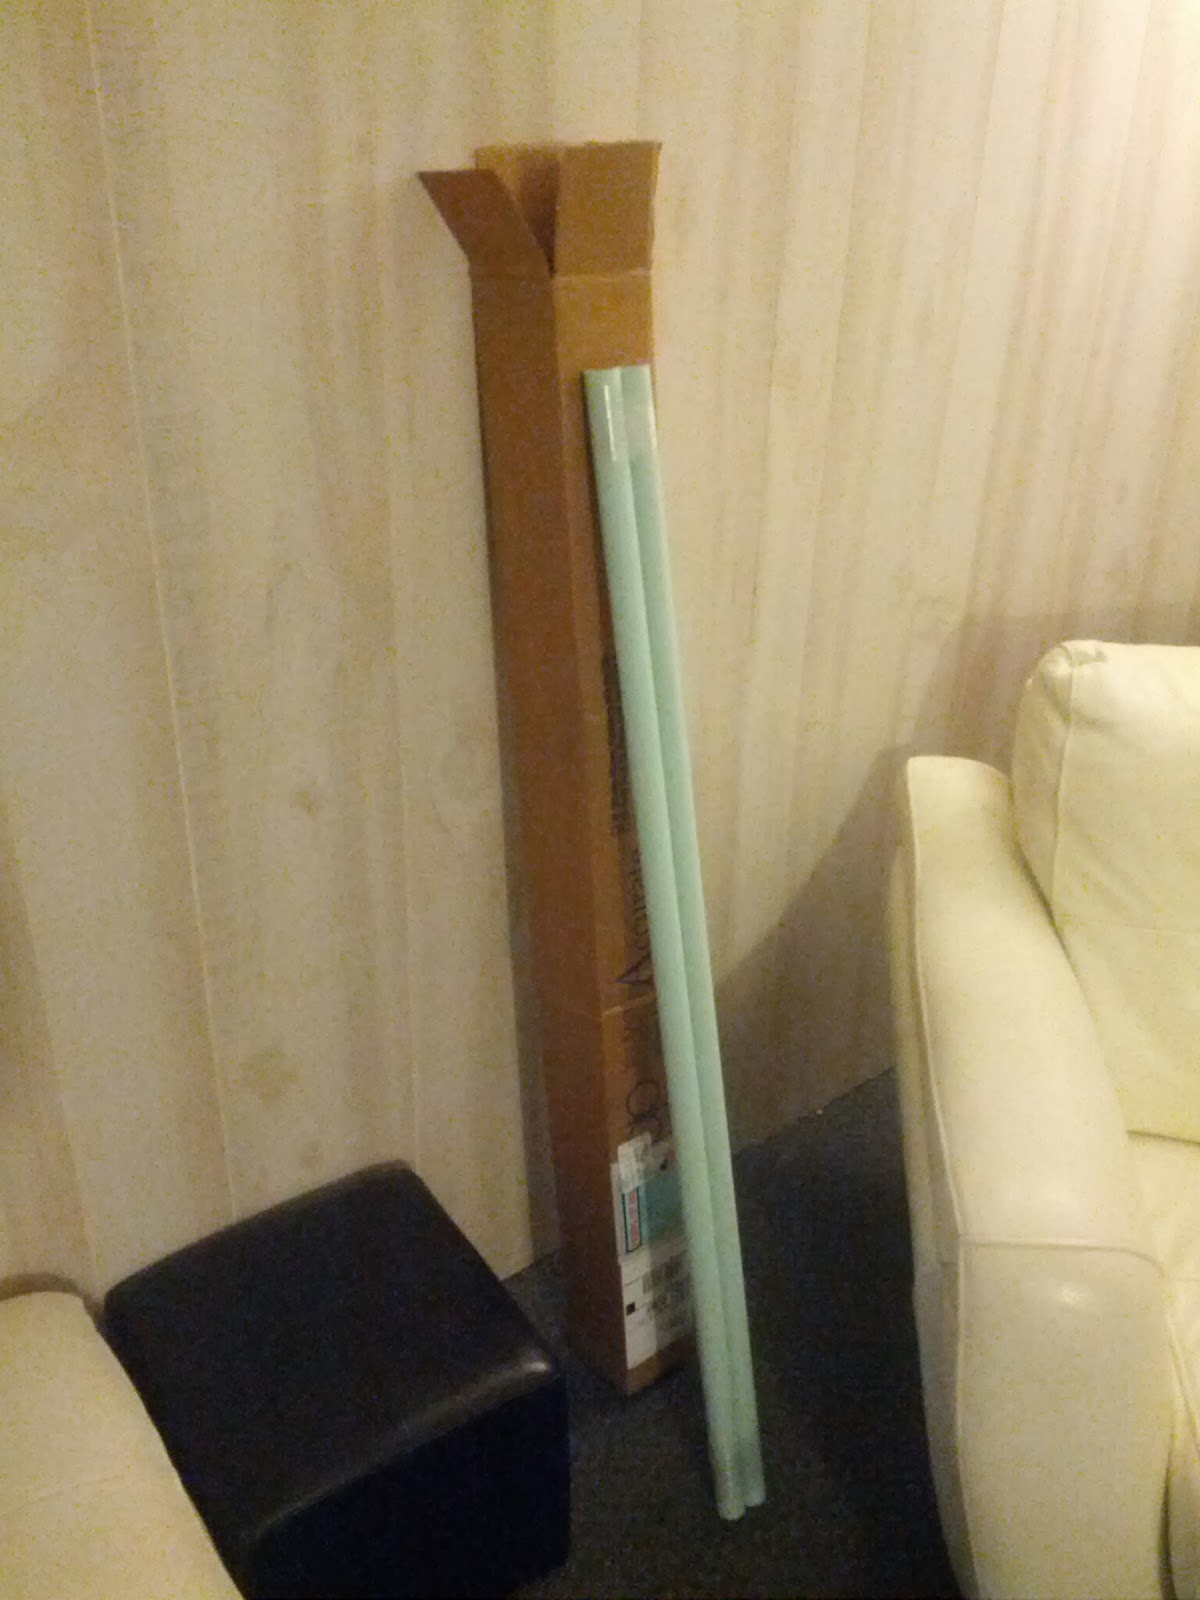
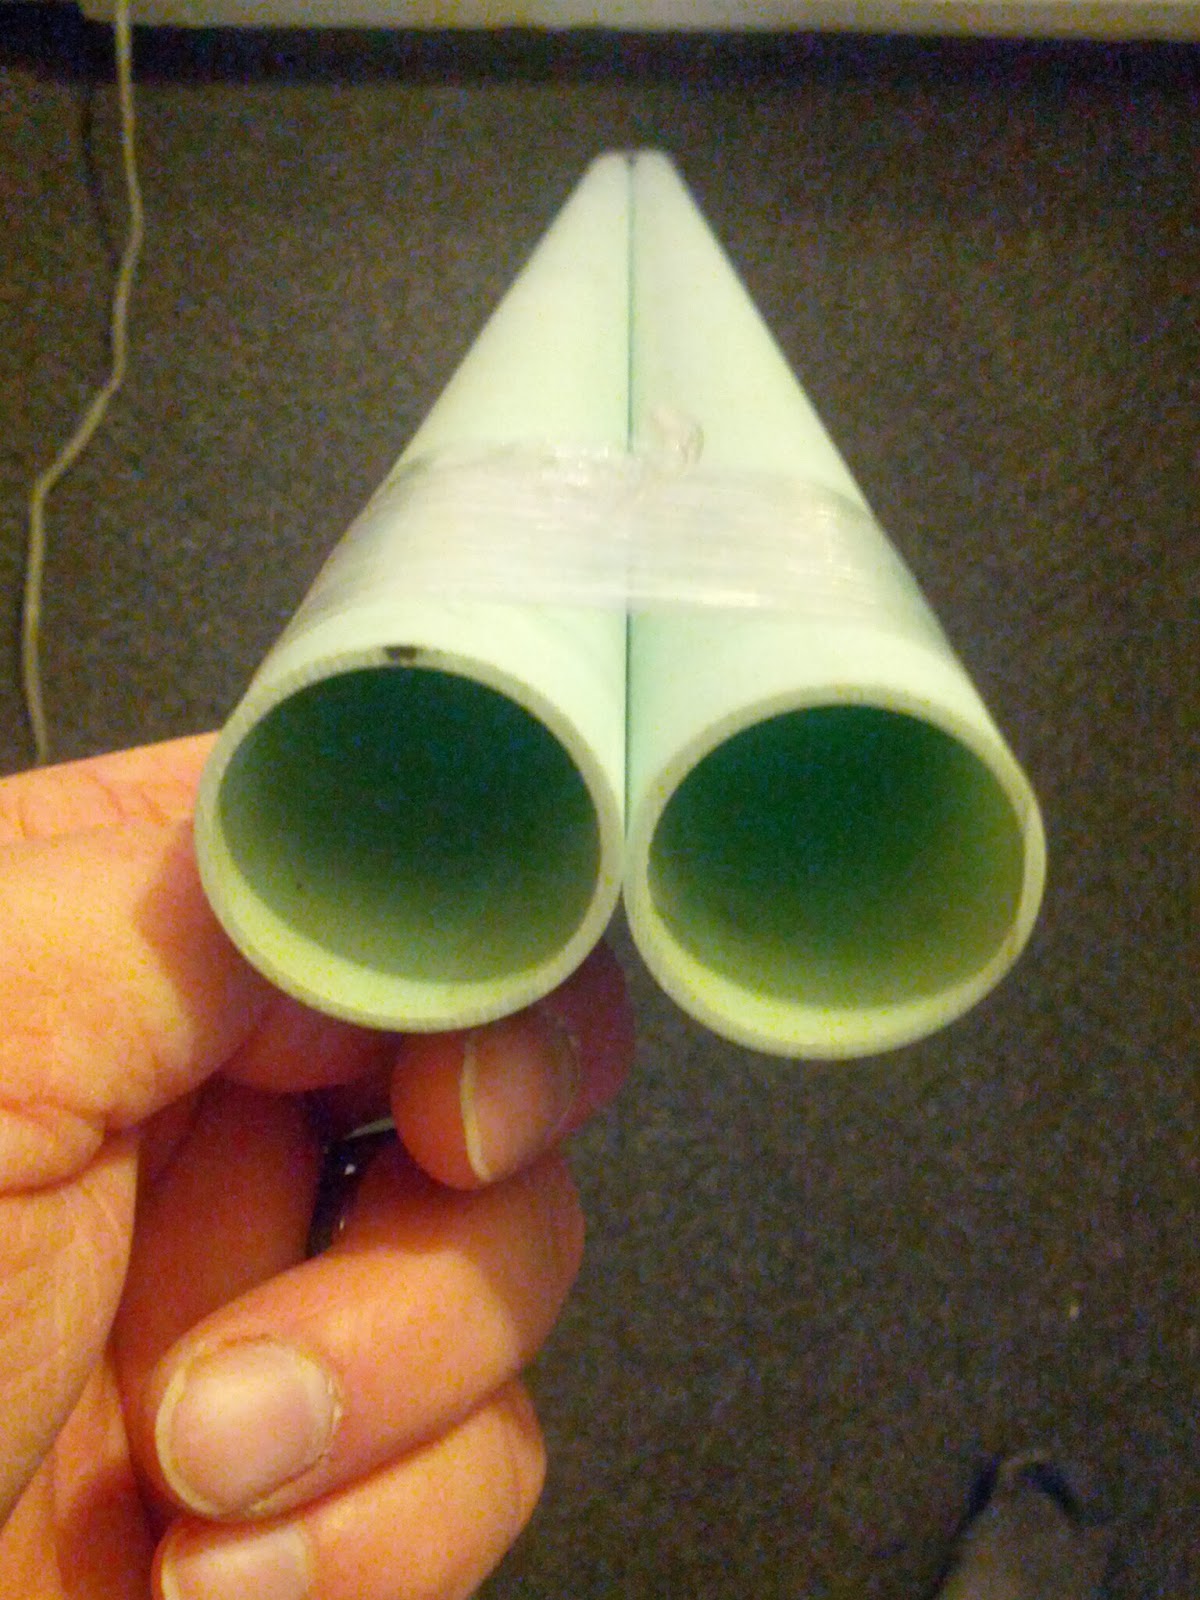
G10 Tubing is expensive and hard to track down in the required dimensions (1.250"OD x 1.125" ID), but after looking high and low I was able to locate a supplier (PlastiFab).
I ordered two 48" pieces that will be cut to size as needed.
They actually came in at 49" (1.25m) each.
Super fast shipping and well packaged.
Friday, December 13, 2013
Monday, September 23, 2013
Beam Mold Model Infusion
This past weekend I surprised my wife with a day at the Spa, a hotel night alone and a day of shopping. After having six children and homeschooling all of them plus being married to me for 23 years it was way past due!
So, while she was off relaxing I thought it would be a good idea to pull the Beam Mold Model out of storage and try to fix the leaks by double-bagging it. That was an adventure in itself as I spent 45 minutes over at the storage unit just moving stuff in and out to find the things I needed. But it was also a good opportunity to find the "Sticky Stuff Epoxy Dispenser". I needed some information off one of the manifolds so I could order a "Low Viscosity" replacement valve for the hardener side.
Anyway, my supply of sample materials is nearly exhausted and I had no tacky tape left over so I asked a friend of mine if I could have a few rolls of some metal roofing tape. The grey tacky tape worked OK, but it only had about 1/2 the stickiness of the yellow tape.
I spent a couple hours on Friday breaking down the wooden mold and then using two bags stuck together to create a larger bag to wrap around the entire part and hopefully seal the leaks. Unfortunately, it didn't help much and I was only able to pull a mediocre vacuum.
Since I really don't have the room to keep this part I decided to shoot it anyway just to see what would happen. So, I mixed up 1500g of Resin and let it go... It took a little while, like five minutes but I was actually surprised when I saw resin starting to pool in the vacuum lines. With all the tape mess and layers of plastic, I couldn't even see the resin front so I really had no idea what was going on inside the bag.
I ran the pump for four hours until things started to gel and then ran it another 30 minutes under full vacuum to dry it out. Since the pump is going back into storage for quite some time, I decided to change the pump oil and let it run with the new oil for another 30 minutes to ensure it was all dry and lubricated inside before shutting it down for storage.
After that was done I put the mold in the Living Room to let it cure while I spent the rest of the afternoon re-arranging the storage unit - mostly to fix the mess I created in the first place.
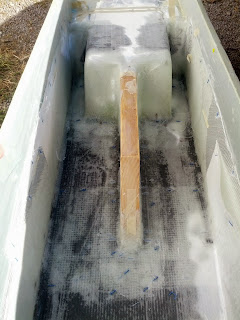
The next day I removed the bag to find this disaster... (not that I was expecting a perfect part)
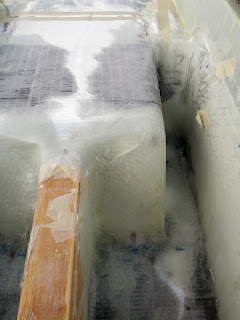 |
| Poor Infusion, but good fabric layup |
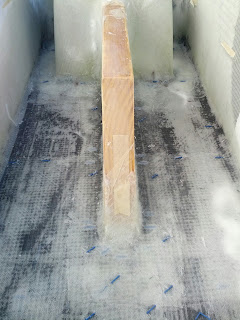 |
| Extremely poor quality infusion |
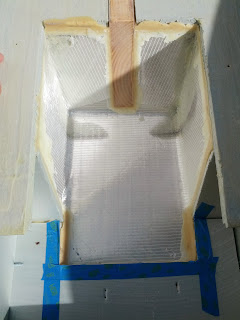 |
| Underneath of model - almost completely dry |
Lessons learned:
- A leaky mold makes for certain disaster - if you can't find and fix the leaks then forget about Infusion!
- My infusion strategy for this part needs to be reconsidered.
- My resin front is way too fast! I keep having the same problem in this area, I will search for some slower distribution media to calm things down a bit.
- I cannot get the entire thickness to infuse - Resin simply race-tracks along the top few layers of glass. Maybe I can infuse without Distribution Media and a "series" type of set up for this type of part?
- I was REALLY worried about getting enough resin back into the base of the Beam Mold. That seemed to mostly work out OK, but everything else was a complete failure.
- Carbon infusion seems to be slower than fiberglass. (Again, the Resin front needs to be slowed down without stalling)
- On the bright side, the patterns I created for cutting the fiberglass seemed to work out well. I have almost 75mm of overlap built into every piece to ensure the necessary strength in those areas.
At the end of the day, maybe this part is better off being made via Bagging instead of Infusion?
I have a few years to think about it..
Shoot me a message if you have some advice!
Friday, June 14, 2013
Disappointing... but expected
I pulled a vacuum on the mold this morning. As expected, it was not nearly air tight.
In fact, you could hear air being sucked right through the foam core.
There is no sense in proceeding with that plan.
I'm not really sure what I'll do now, but at the moment I'm considering stripping the mold, painting the inside with some resin to seal it and proceeding with a vacuum bagging solution.
I keep reminding myself that this stage of the build is a lot of testing and familiarization. No harm, no foul and nothing much lost except some time and a small investment in materials.
Still doesn't make for a happy day.
Monday, June 3, 2013
Vacuum Bag Enlargement
After thinking about the problem overnight, I realized I might yet have enough materials to enlarge the bag if I lifted it straight up out of the mold and formed a single fold down the middle (lengthwise) instead of trying to cut along one of the sides and dealing with all the pleated material.
So early yesterday, I pulled the bag up out of the mold and formed a smooth fold along entire length of it. Once that was done, I applied a strip of tacky tape near the top edge of the vacuum bag along both sides of the fold. Then I cut a rectangular piece of vacuum bag film and folded it in half (lengthwise). Afterwards, I carefully secured the long edges to the tacky tape on the existing bag and sealed up one of the ends.
From open end, I slit the original bag between the two long strips of tacky tape and then all I had to do was seal up the last remaining edge. That worked out better than I expected and a light vacuum applied via the vacuum cleaner allowed me re-position the bag for a tight fit into all the corners.
It's not very pretty, and with the substandard foam materials and subsequent bag patching I don't expect this mold to have very good vacuum integrity.
However, this entire exercise was all about learning the process through trial and error. Obviously, I still have a LOT to learn - but I can already see a huge improvement in my technique -especially with the bag pleating.
I still have some tree removal and gutter repair to do this weekend, so it may a couple weekends before I get a chance to work on finding leaks and doing the injection.
So early yesterday, I pulled the bag up out of the mold and formed a smooth fold along entire length of it. Once that was done, I applied a strip of tacky tape near the top edge of the vacuum bag along both sides of the fold. Then I cut a rectangular piece of vacuum bag film and folded it in half (lengthwise). Afterwards, I carefully secured the long edges to the tacky tape on the existing bag and sealed up one of the ends.
From open end, I slit the original bag between the two long strips of tacky tape and then all I had to do was seal up the last remaining edge. That worked out better than I expected and a light vacuum applied via the vacuum cleaner allowed me re-position the bag for a tight fit into all the corners.
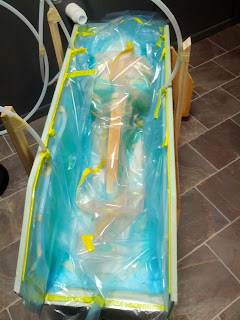 |
| Pink bagging material is the additional piece |
However, this entire exercise was all about learning the process through trial and error. Obviously, I still have a LOT to learn - but I can already see a huge improvement in my technique -especially with the bag pleating.
I still have some tree removal and gutter repair to do this weekend, so it may a couple weekends before I get a chance to work on finding leaks and doing the injection.
Saturday, June 1, 2013
Beam Mold Model Progress
I worked a few hours on getting the Peel-Ply, Perforated Film, Distribution media and lines installed in the model.
The idea is to inject resin along the floor and directly into the rear corners where the fabric thicknesses are greater. I decided to route the Vacuum plumbing into four zones for testing. One entire side has its own vacuum line, while the other side has two "zones". The top of the beam mold is the fourth zone.
The materials are quite slippery and a bit difficult to work with in this situation. I tried using the green "frog" tape to secure the films, but the adhesive is not strong enough so I switched to some regular masking tape. It worked much better. In the end, I believe you should probably have a decent selection of tapes to use depending on what you're trying to accomplish. AirTech sells a few different tapes with different adhesives, they also sell a double-sided adhesive fabric mesh tape. I think that would work very well in some situations.
I cut the vacuum bag with PLENTY of extra material to go into all the corners, but after an hour of carefully sealing and pleating the edges I found that I still didn't have enough material to reach all the corners with enough slack to prevent bridging.
The problem now is that I only have about 1.5 meters of tacky tape left over, which is not enough to cut the bag and patch in some additional film. So, I'll have to put this away for a while until I can figure out some feasible solution. I'm hoping to pick up a roll of tape from some metal roofing company... That should work for what I'm trying to do.
The idea is to inject resin along the floor and directly into the rear corners where the fabric thicknesses are greater. I decided to route the Vacuum plumbing into four zones for testing. One entire side has its own vacuum line, while the other side has two "zones". The top of the beam mold is the fourth zone.
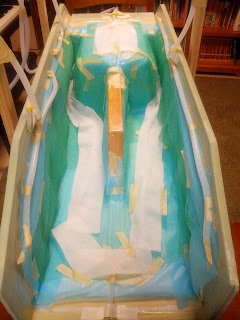 |
| Left side Resin feed line is pushed closer to corner |
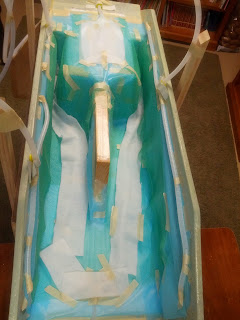 |
| Left side is split into a front and rear vacuum zone |
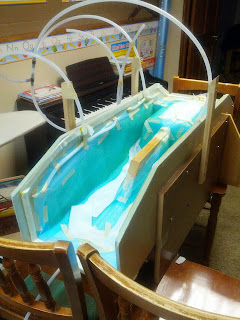 |
| Stakes to support vacuum lines |
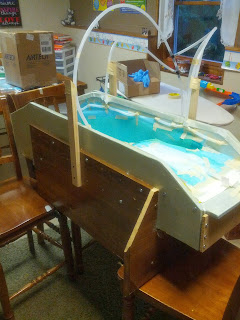 |
| Stakes to support vacuum lines |
I cut the vacuum bag with PLENTY of extra material to go into all the corners, but after an hour of carefully sealing and pleating the edges I found that I still didn't have enough material to reach all the corners with enough slack to prevent bridging.
 |
| Inadequate size of Vacuum bag |
Tuesday, April 23, 2013
Inner Beam fabric layup
Most of the boat building fabric layups are straightforward and do not appear to pose a real challenge at this point. However, when it comes to the beams the story is a bit different! Get these wrong and you'll be in a world of hurt... up to and including death! There are numerous warnings in the instructions to get this part exactly right or end up looking like the skull and crossbones pictures shown.
The manual itself dedicates a large section to beam building and I have reviewed it numerous times. As you might imagine, the instructions show this perfect layup flowing smoothly over all the parts and I just sit here trying to figure out exactly how that fabric will conform to all those angles while avoiding excessive pleats, folds and fiber distortion - especially over the Beam Recess Mold and towards the innermost section.
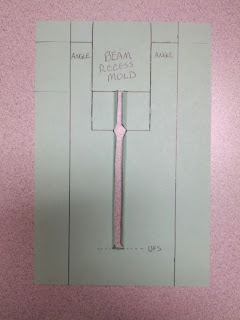
So, I started playing around with some paper models to get some plan worked out. Several ideas came to mind but eventually I came up with the following:
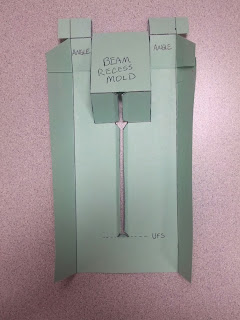

This turned out to be nice and neat, but I had some doubts about the side panels that would be required. Actually, those panels wouldn't even be a problem if I could just lay in a "cap" piece to capture the entire beam mold,, but this part is height critical so you can't just put a bunch of overlaps there.
I sent it over to Ian for review and approval but it was ultimately rejected due to the butt joins required on those side panels... so this idea goes straight into the trash and back to the drawing board I go!
The next pattern will be a two-piece assembly, one over the Beam mold and then tied into the rest of the fabric with 100mm staggered lap joins.
More on that later.
On another note, Endurance emailed me today to let me know the Epoxy will be shipped out today. So I might be able to do my first test infusion over the weekend!?
The manual itself dedicates a large section to beam building and I have reviewed it numerous times. As you might imagine, the instructions show this perfect layup flowing smoothly over all the parts and I just sit here trying to figure out exactly how that fabric will conform to all those angles while avoiding excessive pleats, folds and fiber distortion - especially over the Beam Recess Mold and towards the innermost section.
So, I started playing around with some paper models to get some plan worked out. Several ideas came to mind but eventually I came up with the following:


This turned out to be nice and neat, but I had some doubts about the side panels that would be required. Actually, those panels wouldn't even be a problem if I could just lay in a "cap" piece to capture the entire beam mold,, but this part is height critical so you can't just put a bunch of overlaps there.
I sent it over to Ian for review and approval but it was ultimately rejected due to the butt joins required on those side panels... so this idea goes straight into the trash and back to the drawing board I go!
The next pattern will be a two-piece assembly, one over the Beam mold and then tied into the rest of the fabric with 100mm staggered lap joins.
More on that later.
On another note, Endurance emailed me today to let me know the Epoxy will be shipped out today. So I might be able to do my first test infusion over the weekend!?
Monday, April 15, 2013
Inner Beam Mock-Up
Busy weekend, but I did manage to pick up a few things in town and do a bit more work on the inner beam model.
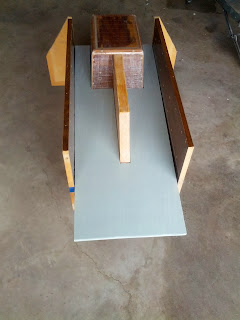
As per the instructions, I put some packing tape onto the Beam Recess mold to prevent the Epoxy from sticking - but after doing so, I can see how this will likely cause some vacuum integrity problems. For the "real" molds, I will go with paint/wax or PVA as a release agent instead of packing tape.
The Upper Folding recess mold is just a scrap piece of 2x8 lumber cut to fit. It is not to scale, but will serve the purposes of this experiment. I did put four coats of epoxy on it to prevent wood moisture, sap & etc from going through my vacuum pump later on.
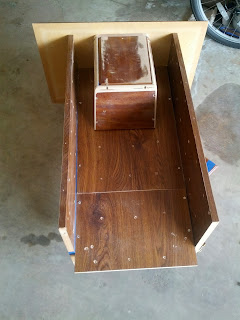 |
| Beam Recess mold in place |
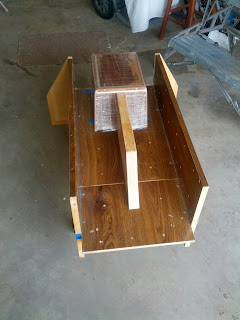 |
| UFS mockup in place |
 |
| First layer of standard home insulation |
One of my biggest concerns is seeing how the fabric will actually lay into the cavity without all the creases and folds. At this point, I just don't see how this will be possible without several cuts and pleats which I'm trying to avoid if possible. To that end, I will try installing three layers of 12oz instead of two layers of 18oz. since it is quite a bit more pliable.
I will try my best, but I really don't want to fool myself into thinking this part will come out exactly as I'd like it to. For now I am leaving the flanges well over-sized.
No bagging materials have been received from Air-Tech yet. I'll call them later today to see if there is some shipment information or status available. I did order a gallon kit of Epoxy. That should be here later this week. It's really thin, I plan to paint on a thin coat on the outside of the foam to help seal it up.
**************
Update: AirTech samples are scheduled to arrive this Friday
Saturday, April 6, 2013
Inner Beam Mock-up
I now have several yards of various fabrics to test with, but I still don't have any of the other materials required for Resin Infusion or Vacuum bagging. Unfortunately, I'm not ready to begin purchasing large rolls of films that may end up sitting around for a year or more just so I can do a few tests... So, last week I started looking around for some Resin Infusion Starter Kits.
Most of the kits I found included items such as Vacuum Chambers, gloves, vacuum lines, fiberglass materials and other things I just didn't need.
They also cost $500-$1200!
AirTech has one of the nicer sites out there with a LOT of different materials listed, so I sent an email to them explaining what I needed and inquired about purchasing small amounts for testing. They called me back early the next day and asked what samples I was interested in and then told me the items would be shipped the next business day!
I was floored - how cool is that!
So now I'll have most of the materials in hand to do a few tests while continuing to pay off some bills, take care of things around the house, purchase tools and prepare for the actual build.
As for Resin Infusion, I've been following the bulletin boards, reading up on anything I can get my hands on and watching YouTube videos over the last three years to learn as much as I could.
I do have a few test cases prepared. There is a requirement to have a certain thickness of solid glass in the beams but I do know that a full vacuum will compress the fibers, so I will do a straight strip with some stair-stepping from one to eight or ten layers and then check the final part thicknesses to determine how many layers will be needed. It will also give me some insight to how the resin flow reacts to multiple layers. I'll also split that test into zones for flow control familiarization. I'll also do a small double-sided panel infusion to see how that goes since that is the method I want to use for the bulkhead construction.
When the build starts for real, I'll be starting with some bulkheads before moving on to the beams. With that in mind, I decided it would be a good idea to build a mock-up of the inner portion of a beam assembly for some hands-on practice.
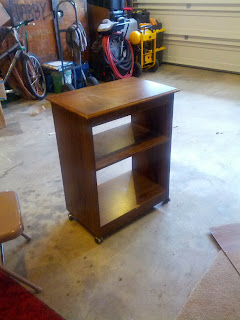
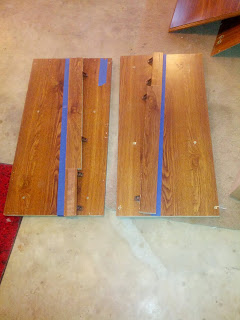
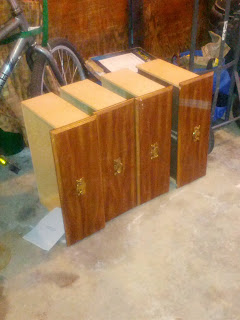
On my way to drop my daughter off at work, I found a TV stand and some dresser drawers someone put out to the road for trash pickup. I threw them in the back of the car and went home to take them apart to create a model. The inner section of the beam mold is very "busy" as there are many layers of glass reinforcements going in along with angle transitions and then some Carbon Uni thrown in to make it fun.
I'm curious if it might be possible to infuse the entire assembly in one shot? But I do believe that's a lot to ask from someone who's never actually DONE an infusion yet.


I'll finish the Beam Mold next weekend and pick up some blue foam panels from Lowe's to use as some test pieces. The blue foam panels are for home insulation purposes and will not be the same quality as closed cell Divinycell foam. As a result, they may not be vacuum tight - so I might have to end up putting a thin coat of epoxy to seal the foam surface. I'll try pulling a vacuum on a solid piece of foam before going that route.
As for Epoxy, I plan on contacting Endurance Technologies next week to see if I can get a gallon or so sent out.
Most of the kits I found included items such as Vacuum Chambers, gloves, vacuum lines, fiberglass materials and other things I just didn't need.
They also cost $500-$1200!
AirTech has one of the nicer sites out there with a LOT of different materials listed, so I sent an email to them explaining what I needed and inquired about purchasing small amounts for testing. They called me back early the next day and asked what samples I was interested in and then told me the items would be shipped the next business day!
I was floored - how cool is that!
So now I'll have most of the materials in hand to do a few tests while continuing to pay off some bills, take care of things around the house, purchase tools and prepare for the actual build.
As for Resin Infusion, I've been following the bulletin boards, reading up on anything I can get my hands on and watching YouTube videos over the last three years to learn as much as I could.
I do have a few test cases prepared. There is a requirement to have a certain thickness of solid glass in the beams but I do know that a full vacuum will compress the fibers, so I will do a straight strip with some stair-stepping from one to eight or ten layers and then check the final part thicknesses to determine how many layers will be needed. It will also give me some insight to how the resin flow reacts to multiple layers. I'll also split that test into zones for flow control familiarization. I'll also do a small double-sided panel infusion to see how that goes since that is the method I want to use for the bulkhead construction.
When the build starts for real, I'll be starting with some bulkheads before moving on to the beams. With that in mind, I decided it would be a good idea to build a mock-up of the inner portion of a beam assembly for some hands-on practice.
On my way to drop my daughter off at work, I found a TV stand and some dresser drawers someone put out to the road for trash pickup. I threw them in the back of the car and went home to take them apart to create a model. The inner section of the beam mold is very "busy" as there are many layers of glass reinforcements going in along with angle transitions and then some Carbon Uni thrown in to make it fun.
I'm curious if it might be possible to infuse the entire assembly in one shot? But I do believe that's a lot to ask from someone who's never actually DONE an infusion yet.
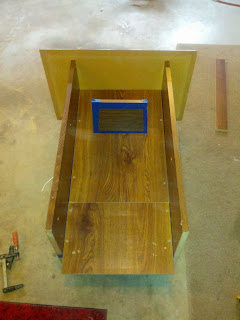
So anyway, here are some pictures of the model being built:


I'll finish the Beam Mold next weekend and pick up some blue foam panels from Lowe's to use as some test pieces. The blue foam panels are for home insulation purposes and will not be the same quality as closed cell Divinycell foam. As a result, they may not be vacuum tight - so I might have to end up putting a thin coat of epoxy to seal the foam surface. I'll try pulling a vacuum on a solid piece of foam before going that route.
As for Epoxy, I plan on contacting Endurance Technologies next week to see if I can get a gallon or so sent out.
Friday, January 18, 2013
Prepping Lower Folding Strut Recess Molds
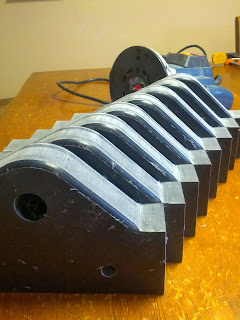
I took a few hours this morning to round over the top edges of the mold pieces and do a little wet sanding with some 400 grit to get them all cleaned up and prepared for use. These pieces are now labeled and packed away until needed.
Next on the list is some G10 tubing, IGUS bearings, a vacuum pump and the actual lower folding struts to use as a standard for adjusting the mold pieces inside the beam.
Then of course some MDF, foam, fabric & epoxy and then a few more tools to be ordered.
It doesn't look like I'll be getting a whole lot done this year, but then again - I wasn't actually scheduled to start until 2017. So I guess I'm way ahead of schedule! Planned completion date is 2027.
  |
Thursday, January 17, 2013
Lower folding strut recess molds
Eight Lower Folding Strut Recess Mold pieces cut out via water jet over at MSI.
Outstanding results, I'm really happy with it. The next step is to run a router around the top edge to round it off. I should be able to do that this weekend.
Subscribe to:
Posts (Atom)
