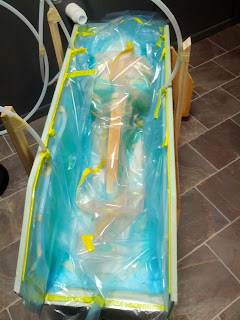
So early yesterday, I pulled the bag up out of the mold and formed a smooth fold along entire length of it. Once that was done, I applied a strip of tacky tape near the top edge of the vacuum bag along both sides of the fold. Then I cut a rectangular piece of vacuum bag film and folded it in half (lengthwise). Afterwards, I carefully secured the long edges to the tacky tape on the existing bag and sealed up one of the ends.
From open end, I slit the original bag between the two long strips of tacky tape and then all I had to do was seal up the last remaining edge. That worked out better than I expected and a light vacuum applied via the vacuum cleaner allowed me re-position the bag for a tight fit into all the corners.
 |
| Pink bagging material is the additional piece |
However, this entire exercise was all about learning the process through trial and error. Obviously, I still have a LOT to learn - but I can already see a huge improvement in my technique -especially with the bag pleating.
I still have some tree removal and gutter repair to do this weekend, so it may a couple weekends before I get a chance to work on finding leaks and doing the injection.
No comments:
Post a Comment